Monthly Archives: August 2013

Tim’s Candy Crane – Tim Johnson

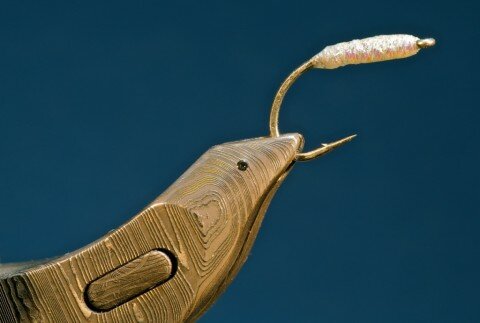
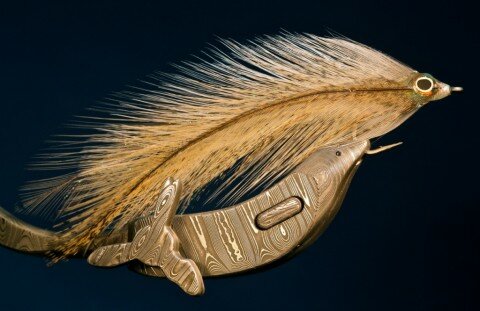
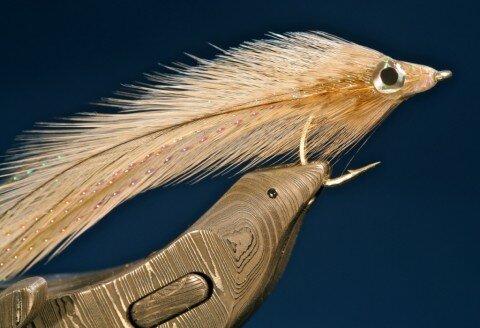
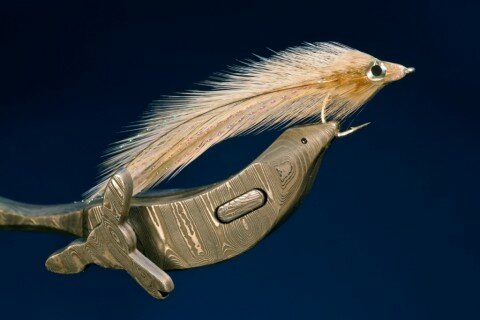
Tim Johnson is a guide at Falcon’s Ledge and is a very talented fly tyer. Here is his tutorial on the candy crane that was just picked up by Orvis. But you have to read the story that Tim wrote that goes along with it to appreciate this cool bug even more!

At an Orvis guides’ rendezvous in Casper, WY, my Falcon’s Ledge friends and I attended a workshop on entomology.  Expert entomologist Robert Younghanz waded into the North Platte and returned with all kinds of macroinvertebrate samples which he dumped into a dozen or so water-filled trays for the guides to study.  We were all given alcohol-filled vials and tweezers and invited to take what we wanted.  Only fellow fly fishing junkies could possibly understand why we all felt like kids in a candy store.All the “bugs” were interesting, but I was immediately captivated by the enormous crane fly larvae that populated every single tray.  They were HUGE and way more plentiful  than I had ever imagined.  I asked Robert about the typical size of these crane flies and how widely and densely distributed they might be.  Basically I wanted him to make me feel better for not having a crapload of these in my box and for rarely fishing them.  Looking at bratwursts before me, I needed the “bug guy” to give me some justification for why everyone wasn’t using them all the time in rivers like the North Platte, or in my Utah home waters like the Provo, the Green and everything in between.  Maybe they’re not in most rivers?  Maybe they rarely get dislodged from the streambed?   Rather than making me feel better, and assuring me that we weren’t all idiots, Robert said that they are undoubtedly the most underfished fly in the world!

No excuses.  They’re big.  They’re bad.  They’re beefy.  And they’re available to trout in most every river we fish.  The trout are certainly eating them.  In fact, I can’t imagine one of these hapless, chubby, porkchops makes it too far downstream before that hole’s alpha-trout pounds it.  So I had to wonder, why aren’t we fishing them more?

I took more than my fair share of the beautiful little sausages that day and studied them closely.  They were huge (some were pinky-finger-sized!), and clearly segmented, things I’ve seen in every decent crane fly larva pattern I’ve ever seen.  What struck me most though, was their obvious translucence.  They almost seemed to glow in the sunlight.  Very soon after dying in the alcohol, however, they turned opaque and drab.

From that day forth I was a man possessed.  I tried various methods to get that translucent glow into a fly dressing, but nothing was both accurate and efficient.  Dubbings, furs, herls, all had good properties but lacked that hypnotic, translucent glow through the middle.  With the popularity of UV-cure resins a few years ago, I finally had the obvious solution. With a bright core of krystal flash to prevent the dark hook shank from stealing light, and using clear UV epoxy to create the requisite beefiness without blocking the glow, I had the size and the sheen I’d been looking for.  It was time for the Candy Crane to go to Beta testing.

The final version’s virgin dunk was on Montana’s Beaverhead.  A BWO hatch was in force and fish were intermittently rising and feeding on the emergers. I figured the Candy Crane would make an ideal lead fly; it would glow big and bright and get the attention for the emerger pattern I put on point.  Maybe stick the occasional fish not keyed in on the hatch.  In reality, it stole the show.  In the middle of a BWO hatch it outfished every baetis pattern I tried 3 or 4-to-1!  Since then it has produced for me and my friends from Montana to Arizona, even in stillwaters.  Now the jig is up and it’s available through Orvis.

Use the Candy Crane as your lead fly to grab attention and stick the fatties, and drop from it the fly du jour on your local water.  You won’t be disappointed.

2 Comments

Filed under Step by Step, Trout flies

Cream Variant – Elsie Darbee

I wanted to post a fly by Elsie Darbee. This is an old Catskill dry fly called the Cream Variant. I’ll post more information about Elsie and her husband Harry. Both are legendary Catskill fly tyers. For now, here is a fly tied by Elsie.

Hook: Mustad R48 or Tiemco 921, size 12.
Thread: Yellow.
Tail: Cream hackle barbs.
Body: Cream hackle stem.
Hackle: Cream tied on as a collar.

elsiedarbee3

2 Comments

Filed under Catskill, Classic

Hunkering’ down in the bunker…

far from the tourist gridlock…

Pete Gray sent me a few more photos of some flies he’s been working on. If you missed the last post about Pete, you can find it here. Here is the latest…


they all seem to start off like this…

F70A1870and then…

F70A1868

F70A1872

F70A1874

Comments Off on Hunkering’ down in the bunker…

Filed under Streamers

Jawbreaker streamer – Theo Anest

I’m a fan of bass streamers, because I love bass, period. This streamer caught my eye and it’s called the Jawbreaker. Theo Anest of Colorado created this one. The reason bass will love it is because of its jigging action with a lot of movement added by rubber legs and a curly tail. Here is Theo showing how to tie it. The fly is sold by Solitude Fly Company.

Comments Off on Jawbreaker streamer – Theo Anest

Filed under Largemouth, Smallmouth, Step by Step, Streamers

Bise’s Stimulator

Dustin Bise shows us how to tie one of his favorite flies, Bise’s Stimulator. I’m a fan of Dustin’s patterns and this one looks like another great one from him. I really like the buggy look of this fly.

MATERIALS:
• Size 8 Dai-Riki #270
• UV2 Golden Stone X-Seal Dubbing
• Grizzly & Brown Saddle Hackle
• White Widow’s Web
• Elk Hair

Comments Off on Bise’s Stimulator

Filed under Step by Step

Fish-Mask released!

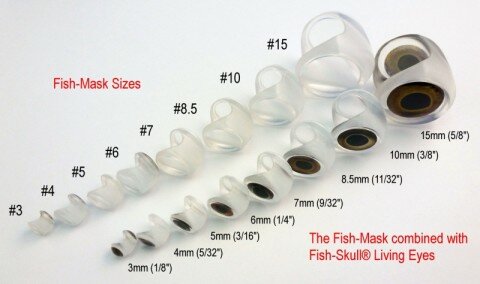
A few days ago Flymen Fishing Company officially released their Fish-Mask. This is like a weightless Fish-Skull. This effect would be something you would normally use a UV resin or epoxy to achieve, but this makes things much simpler. As you can see by the image below there are many sizes available. To read much more detailed information Flymen has a full page of information over on their website.

Fish-Mask_range-text

Comments Off on Fish-Mask released!

Filed under New Product

Loon Outdoors UV Clear Fly Finish review

uv-fly-tying-kit-lg

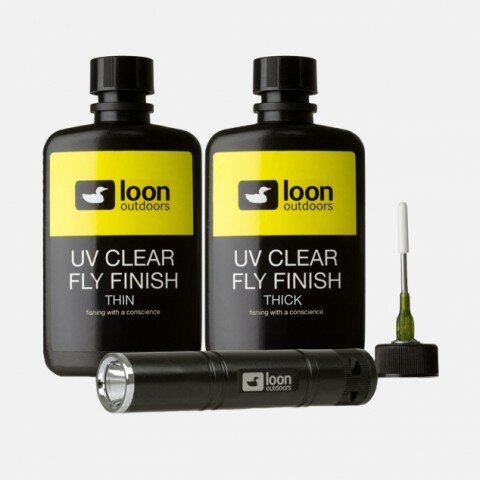
I’ve been using Loon Outdoors UV Clear Fly Finish for several months now and feel it is time I can write my thoughts about the product. UV Clear Fly Finish comes in two flavors, thin and thick, and there are uses for both.

UV Clear Fly Finish is a UV cured glue. This means you can apply it, and it will not solidify until you cure it with a UV light or place it in direct sunlight. Loon has the product available in a UV Tying Kit that includes, the Thin, Thick, and UV Power Light, or you can buy each one separately.

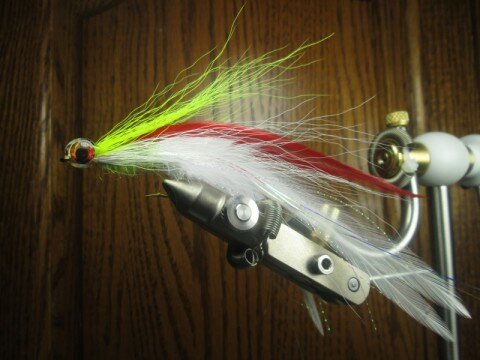
As you can see below by this deceiver style fly I tied, you can build nice clear heads with this stuff.  I used the Thick to begin forming the shape and cured it in stages, applying the Fly Finish over itself after curing each stage. On the final coat, I used Thin to help with tackiness.  In my experience with any of the UV resins, the thicker you apply it, the more time it takes to cure it. I’ve been using Loon’s UV Power Light and it does a good job, but I feel these types of lights could be stronger. The UV Power Light is much better than the light I was using before. Basically, the stronger the light, the quicker and better experience you will have with curing any UV resin on the market.

IMG_0302-800

One of the first questions everyone asks is about the tackiness of the glue after curing. Using the Thin, is the best way to achieve less tack. It is difficult to avoid tackiness if you only use the Thick. But, again in my experience, this is true with other resins as well. I have been able to achieve a tack free touch with the Thin. Always make sure your light has strong batteries. So with thicker heads, like the one on my deceiver, I always apply a final coat of Thin as I mentioned before.

I haven’t noticed any yellowing or fading of the product after the fly has sat for an extended period or fished.

I’ve recently tried UV Clear Fly Finish on my knots in my leaders to help secure them. I just checked and the resin is still covering the knots and is hardened well. I just had that same leader in the water yesterday. Loon produces a product for this purpose called UV Knot Sense, but the Fly Finish seems to have the same effect. It may be the same formula, but I don’t know that to be a fact.

Finally, I feel Loon Outdoors UV Clear Fly Finish is a good UV resin. I think it does a great job of doing what it’s advertised to do. Loon always strides to manufacture products that are non-toxic to help preserve our environment which always makes me feel good. I do think we could benefit by having much stronger UV lights in this area. Maybe that will be the next step. However, I’m confident in using Loon Outdoors UV Clear Fly Finish for my UV resin fly tying purposes.

To learn more and view other Loon Outdoors products, visit their website.

20 Comments

Filed under Product Review

Roosterfish fly, Chivo Lisa – Gary Graham

I find roosterfish fascinating, so one of these days maybe I’ll get a chance to fish for them. I contacted seasoned fisherman, Gary Graham about sending more information, including some flies. To start, here is a roosterfish fly called Chivo Lisa. Head over to Baja on the Fly to find out more about guides in the Baja area.  More to come!

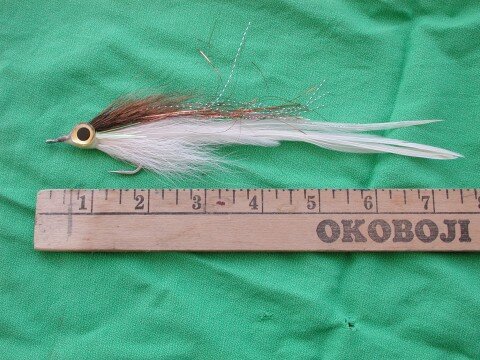
chivolisa


Hook: Mustad 3407 Size 5/0
Thread: Big Fly, White. Size B, Mono Thread
Hackle: Long white saddles ( at least 6″ ), Stiff white Ewing saddles
Body: White Bucktail
Gold Molded Epoxy eyes
Root Beer krystal flash
Silver krystal flash
Gold Flashaboo
Copper Flashaboo Mirage #3065
5 Minute Epoxy

Tying Tips

Tail:  a sparse selection of white bucktail, topped by a few strands of krystal flash forms the under structure and gives the tail a bit more body and support. Long white saddles are tied in on each side. Perhaps two feathers per side. Long, stiff Ewing Saddles are then tied in on each side of the first saddles. These are not tied as long as the first saddles and provide the true body and structure for the tail. Staggering their length as they are tied on seems to really make the feathers wiggle when fished.

Once the first set of stiff hackles are tied on add a few strands of root beer krystal flash, and gold flashaboo as long as the tail.

Body: Once the tail saddles are set a clump of long white bucktail is tied in to begin to build the body. I both spin the bucktail and tie in clumps top and bottom to achieve a symmetrical look as needed. After a couple of applications of bucktail top with a few strands of copper flashaboo not quite as long as the first flash that was tied in.

All this tapering of the materials is the key to making the fly look and swim right.

Once the bucktail is done tie in 2 more Ewing saddles on each side of the hook shank.

Now add 2 long strands of silver krystal flash to each side of the body right along the “lateral line”, and some more strands of the copper flashaboo to finish off the flash.

Switch to monofilament thread for the final steps.

Tie on the gill plates with pieces cut from mylar gift wrapping paper or use a short clump of copper flashaboo fibers.

Top off the head with a clump of the natural brown fibers from the white bucktail. By now you should have a fairly good sized head, two tone brown and white with gill plates.

Add gold epoxy eyes and finish with a generous coating of 5 minute epoxy with an emphasis on a smooth symmetrical head.

Comments Off on Roosterfish fly, Chivo Lisa – Gary Graham

Filed under Saltwater