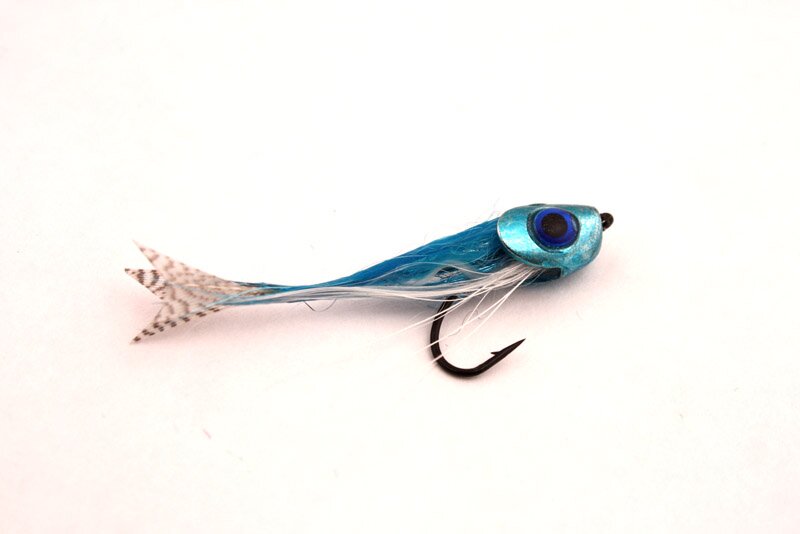
I ran into this pattern when Ulf Hagström posted it on Facebook for the Steelhead Alley Outfitters fly contest. I was immediately struck by the shape and look, because I thought it was a killer baitfish pattern. I messaged Ulf and he had posted a step-by-step a couple of years ago on his blog, The way of the /:Fly:/. I thought it was worth republishing it here on FrankenFly, so with Ulf’s permission, here it is.
I think that this is a darn nice pattern, it moves perfectly and it is pretty straight forward to tie, so I’ll share it with you!
It involves a realistic touch with the tail fin, a feature that of course is optional, which does give the fly a very nice vibrant movement when retrieved. My intention when I created it was to use it for our coastal run sea trouts here in the baltic sea, but I’s proably a good fry pattern to use for big browns or any salt water fish too.
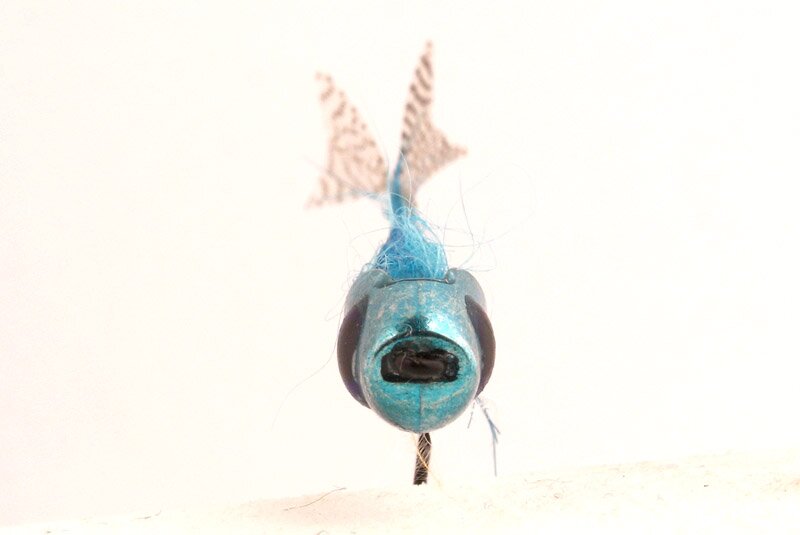
Now you might ask why I use two feathers for the tail, I haven’t seen any fish with a double tail fin like that have you? Well the answer is simple. The curving shape of any feather will make the fly rotate like a propeller if you only use one, if you use two you will have them work against each other creating a nice vibrant movement.
Hook: Partridge YK12ST size 10
Tail: 0.30 mm mono with two varnished feathers
Body: Blue fox fur on top with white fox on the bottom over blue angel hair.
Head: Blue Small/Medium Fish Skull
NOTE: Click on any image to zoom in and view slides in better view.
- Start the creation of the tail by treating two feathers of choice (these are small mallard feathers) with a varnish or like I do with the UV resin Bug Bond. Here’s one varnished and one who’s not.
- The tail is gonna be created on a piece of mono, and I like to use a cheap 0.30 mm mono for spinning fishing for this. It is thick enough to stand a little beating without breaking but still thin enough to move with the tail “fins” when retrieved. I flatten the mono where the feathers are gonna be tied in, this will make the tie in point much more secure and prevent the tail feathers from coming off.
- Now, I do the tails with the mono in my hands. Pinch the first feather where the mono is flattened and with the tying thread tie on the feather as close to your fingertips as possible.
- Do the same thing with the other feather, and once you have tied both feathers in treat the whole tie in point with a double layer of super glue.
- Press the two feathers together and cut them into a nice tail shape.
- Now let’s get to the tying! Insert the hook in the vise and tie in the tail section letting it stick out about 6 cm. Don’t cut the waste mono just yet.
- Now fold the mono back and tie it down again, cut off the mono waste and treat the whole tie in point with super glue. This folding of the mono will ensure that it doesn’t slip off the hook.
- Take a small amount of blue angel hair or wing and flash the same length as the tail section, the same thing goes here don’t cut the waste just yet.
- Now fold the forward part of the flash backwards and spread it around the top section of the hook and then cut it down to shape and also secure the whole thing with a couple of good wraps of the thread.
- Tie in a small amount of blue fox hair on the top of the hook, make sure it is not longer back than the tails. And again don’t cut the waste!
- Do the same thing on the underside of the hook with white fox fur.
- Now fold the access blue fox backwards and spread it around the top section of the hook. This makes the fly more streamlined and also gives a better fit on the head once it is slided on.
- Tie down the white fur down to the hook eye and cut off the waste. Finish the fly here and cover the whole tie in point with super glue. And…
- ..now slide on the fish skull while the glue is still wet.
- Glue on the eyes on each side socket with a drop of super glue.
- Now what I like to do is fill up the top crease of the head where the hair meets the head with some Bug Bond UV Resin like this, and the same thing on the bottom section.
- Also I cover both eyes with Bug Bond to secure them a little extra. Also makes the eyes look more 3D like.
- Hold the fly under the warm water tap for a while will make it more streamlined and you will see why I liked to bond the hair with the head with Bug Bond like I did, it makes a more seamless transition between head and hair.

